Feeds:
Posts
Comments

Hi Everyone!

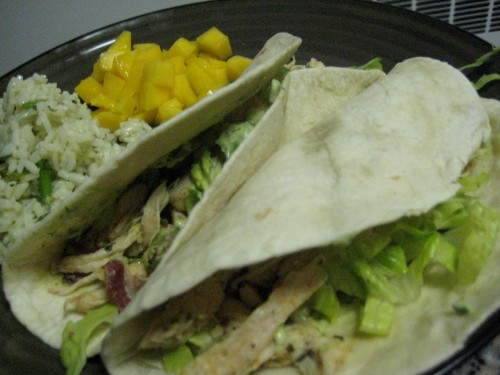
Tacos put a pretty big smile on my face. They are so easy to make, and you can be creative with them. You must try this taco recipe! So delicious…

Makes 5 Tacos (You can play around with the ingredients)

Avocado Lime Sauce Ingredients

5 Chicken cutlets- Browned, then shredded

Shredded cabbage or iceberg lettuce

1/2 cup Fresh Cilantro

1 Shallot Minced

1 small green bell pepper

Extra Virgin Olive Oil

Pinch Cumin, Cayenne Pepper, Salt, Pepper

2 Strips of Bacon Chopped

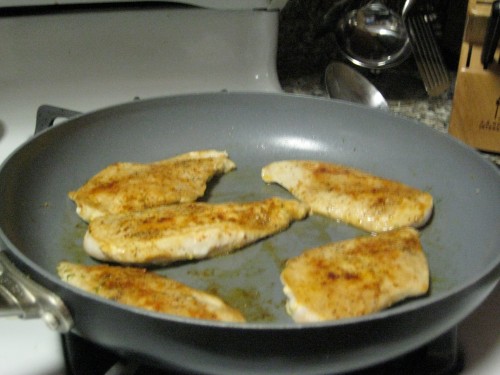
First make the Avocado Lime Sauce in a food processor and set aside. Cook chopped bacon, and set aside. Discard extra bacon fat. Season each side of the chicken cutlets with the cumin, cayenne pepper, salt and pepper. Heat same pan over medium high heat with a tablespoon of olive oil.  Cook on both sides for about 3 minutes each until browned (my cutlets were pounded pretty thin).

Remove from heat and shred with two forks.

Cook shallots for 4 minutes over medium high heat. Add shredded chicken, chopped bell pepper, and cooked bacon. Cook together for about 4 minutes.

Fill your favorite heated taco tortillas with the avocado sauce, chicken mixture, and cabbage. Serve with a side of Bobby Flay’s Green Rice (Spicy!), and sweet mango.

Enjoy! Now, did that not sound so easy?! Yummmmmy 🙂 My boyfriend, our friend, and I cleared our plates a little too quickly.
My mother and I have kept a vegetable garden for as long as I can remember.  It has been full of fresh herbs, different bright vegetables, including my favorite…..tomatoes.! Every Summer day, I would keep a close eye on the tomatoes anxious for them to ripen. At night, quietly, I would bring a flashlight outside and check on them again. Excitement filled me as a little girl when the tomatoes that my mother and I planted began to grow. First, just a vine, to vine full of green tomatoes…and finally to a vine full of red-ripe tomatoes.

The truth is….when I go home to Long Island, I still check on those tomatoes frequently, anxious to eat them! Yesterday, when I got back to LI,  I was welcomed with a garden full of ripened tomatoes! Four to be exact, four pretty tomatoes. So I picked them along with some fresh basil!

Of course, I sliced one up for lunch. Topped it with some feta, fresh basil, olive oil and drizzle of red wine vinegar. So juicy and YUMMY!

So, I am taking two of yummy tomatoes back to the city with me (I will leave one for my mother to enjoy). I also packed myself a bag of basil, chives, and parsley.

Hmm….what shall I make with my fresh tomatoes and herbs?? Stay tuned!

Looks like another one will be ready to be picked again very, very soon! 🙂

Sometimes the best dishes are planned last minute. I just have so much fun as I search through my fridge and the cabinets, see the ingredients I have, and put my creative cap on. The other night, it was about 7:45 pm and I was looking at the ingredients that were available. I always have a bag of frozen shrimp from Whole Foods. Yes, I love fresh shrimp but do not always have time to run out and get it. But trust me, if frozen shrimp is thawed out the right way, and only cooked until pink,  it really tastes good. So I had the shrimp, then I saw the beautiful fennel bulb I bought, beets, bacon, and of course lemons. In only about 15 minutes, my boyfriend and I had a good looking bowl of shrimp. These ingredients married together beautifully.
This is what you need for two hearty bowls.

20 medium sized shrimp (deveined, tail off)

2 bacon strips chopped

1 lemon zest & juiced

1 fennel bulb chopped (only the bottom of fennel is used)

2 medium sized beets sliced or 1 can of beets

3 tbs Extra virgin olive oil

3 tbs sherry

1 pinch salt & pepper

parsley for garnish

Preheat oven to 375

How to Thaw Frozen Shrimp: Place shrimp in a strainer in the sink. Put on the cold water and rinse until thawed. Be sure to move the shrimp around from time to time to be certain that cold water touches all shrimp. This takes about 10 minutes. When thawed, remove tails with fingers and dry shrimp with a paper towel.

As the shrimp are being thawed, put the sliced beets on a baking sheet  with 1 tbs of oil and put in the 375 oven to roast for about 10 minutes. At the same time, cook the chopped bacon in a pan. Do not add oil when cooking bacon (it already has enough fat). After bacon is cooked, remove from heat. Drain some of the excess oil. Add a tbs of oil and the chopped fennel in the same pan and cook until tender (5-8 minutes). Now, add the shrimp evenly on pan, be sure that all shrimp are leveled. Add the sherry, lemon juice, salt and pepper. Turn the shrimp when pink on the bottom.  Add the roasted beets, lemon zest and cook until both sides of shrimp are pink. Taste and adjust salt or pepper if needed. Serve in a bowl with the broth and top with parsley.
How easy does that sound? It was so simple,  pretty and delicious.
Cubana Cafe Soho

Tucked away in Soho is a little Cuban Restaurant, Cubana Cafe. As I walked on Thompson Street a few weeks ago I noticed this quaint blue basement restaurant. Cubana Cafe has been on my mind ever since. Finally this Friday, I had a chance to eat there with my girlfriends, Amanda and Nicole. This quaint spot  instantly put me in a relaxed-good feeling-Friday mood. Of course,  we started with a pitcher of sangria, which was delicious! I then ordered one of my favorite Simple Cuban dishes, Ropa Vieja. Even though it was difficult, I tried to eat it slowly to make it last! I failed, it did not last for long. It was just too good. Now I keep thinking about ropa vieja. It is difficult not to fall in love with a slow cooked steak that is cooked in sherry, tomatoes and peppers. It is so tender and juicy, you will all love it.  I will have to make it soon and share my recipe with all of you.

A side of avocado was ordered as well! Avocado with a squeeze of lime is one of my favorite sides.

And here are the sauces that were enjoyed by my friend Amanda often throughout this meal. The green sauce is one of my favorite simple traditional Cuban sauces, parsley pureed with garlic.

If you are ever walking on Thompson Street in Soho, keep your eyes peeled for Cubana Cafe. Trust me you will have a great experience. You will not only enjoy the atmosphere, sangria and the yummy food. You will throughly enjoy the inexpensive prices! But, they only accept cash- so go prepared, so that your friend (Amanda) does not have to pay for you. 🙂

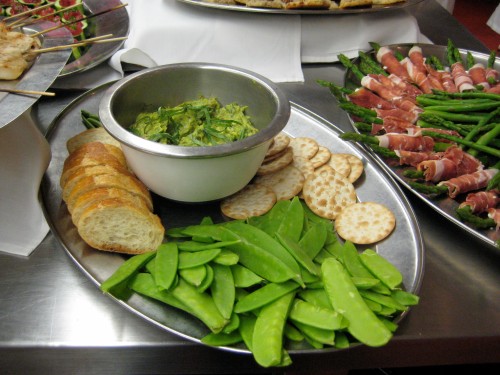
Hi Everyone! I had a very exciting day. I got the chance to spend it at the Institute of Culinary Education. The amount of happiness that a kitchen brings me,  even on a beautiful NYC day is pretty humorous. Anyway, this fun day started with a meeting with the head chef. Here we went through the menu and discussed the ingredients. The menu consisted of  delicious Hors d’oeuvres. After the meeting, we broke up into groups to prep and cook. Look at how pretty the Hors d’oeuvres came out!  I am so proud. I will post all of the recipes sometime this weekend (My group made a few tweaks to the recipes). 🙂

Endive Leaves with Roasted Red Bell Pepper Salsa

Silver Dollar Crab Cakes 🙂

Lemon and Ginger Seared Shrimp

Zucchini Pancakes

Tuna Tartare in Cucumber Cups

Portobello Mushroom Herbed Croustade

Asparagus Wrapped in Prosciutto and Goat Cheese

No, these are not cookies! They are Pecan-Blue Cheese Crackers!

Guacamole Provencal with Crudites

My Plate!! 🙂

Look for the recipes this weekend!

As I shared last week, I want to expand my food horizons and start baking . Yes, I did bake that Blueberry Crumble the other day. But that was with my Mom’s help and with the use of her pantry. Here, I had a BIG problem , I did not have many of the ingredients that are needed to bake. So I took your suggestions went shopping! I went to Whole Foods and bought the ingredients that were missing from my “pantry”. Then I went next door to Bed Bath & Beyond and got a baking mat to use instead of parchment paper.I also got sucked into buying a “Environmentally Pastry Mat” for the counter…oh well, it was $4.99.  So..now I am all set!  Now the question is…what should I bake??

I have a few ideas. But of course, please share your thoughts.

I know that I posted this morning, but I needed to share this…..I took a leap and I baked bread sticks. 🙂

Parmesan-Chive Bread Sticks! I am so proud, how pretty do they look??

Full recipe will be posted tomorrow.:)

(Image from MAX’s website-No, I did not get to cook with the chefs. I wish. )

As my friends and family know..I have a long list of restaurants that I want to try. Slowly, new restaurants get checked off. Slowly…… because I often can’t resist the food at tasty places and go back. Last night, I finally tried a restaurant with my friend that has been on my list and…….I fell in love. Max-Tribeca is a cozy Italian restaurant with dim lighting, dark wood walls and floors.The beginning of this relationship between MAX and I began with bread that was served along side a bowl of olive oil with tomato sauce to dip in. For an appetizer we ate a very generous-crispy and fresh serving of bruschetta at $7.95.  Then it arrived…the Fettuccine Al Sugo Toscano (Fettuccine with MAX’s tomato meat sauce that I have been very anxious to try). It was just as I had imagined … simple yet ABSOLUTELY DELICIOUS. The generous portion more than satisfied my palette at only $11.95. If you have not yet met MAX, please do and you will fall in love.

Bread with olive oil tomato sauce dip…yum!

Bruschetta…yum! I started to eat before taking a picture of the beautiful presentation..whoops!

There is it! The simple and delicious Fettuccine Al Sugo Toscano.

Pizza Remake

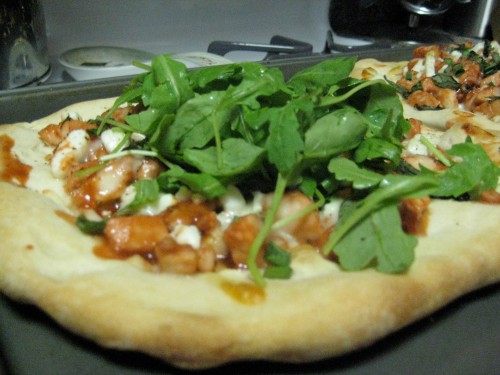
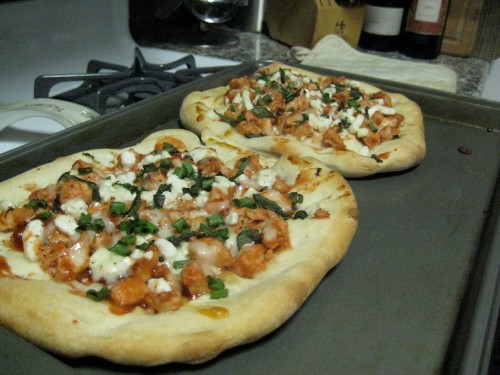
About a year ago, my friend and I went to a new pizza place called Yolo. It is near her apartment in Astoria. We did not having any expectations. We were very hungry and wanted to try a new place. Little did we know, we were going to be introduced to such a delicious pizza. I love all of the ingredients on the pizza but, I had never tasted the them in one bite….it was delicious! Ever since then, we have ordered the pizza a few times, and of course…I had  to remake it at home. How does BBQ chicken, goat cheese, and arugula sound?  Last night I made this pizza for my boyfriend and I. He loved it! You can play around with the ingredients below. You can add as little or as much on the pizzas as you like. Please try it, its so simple and you will love it!

Ingredients (Personal Size Pizza, distribute evenly on each)

Pizza Dough Cut in Two (I get mine already at Whole Foods or the local pizza place)

Flour for dough

Cooked Chicken (cut into small pieces)

BBQ Sauce ( As much as you like)

Goat Cheese (As much as you like)

Baby Arugula

1 Garlic Clove Minced

3 Basil Leaves Chopped

1/2 Cup Scallions Chopped

1/2 Cup Shredded Mozzarella

Extra Virgin Olive Oil for Drizzling

Pinch Salt/Pepper

(Cooking time described below is for Two 6×6 Personal Pizzas-You will need to add some time for larger pizzas)

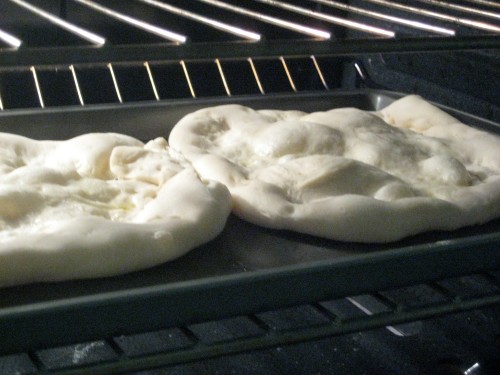
Let the pizza dough sit at room temperature for 20 minutes. Preheat the oven to 425 Degrees. Shape each piece of dough into a ball. Spread some flour over the area. With your fingers, begin to carefully stretch out the dough into a disk. Lift the dough and begin to pull carefully , and let it stretch until it is your desired size. Drizzle pan with a little bit of olive oil. Bake the dough for 10 minutes until the dough is golden brown, and a bit crispy.

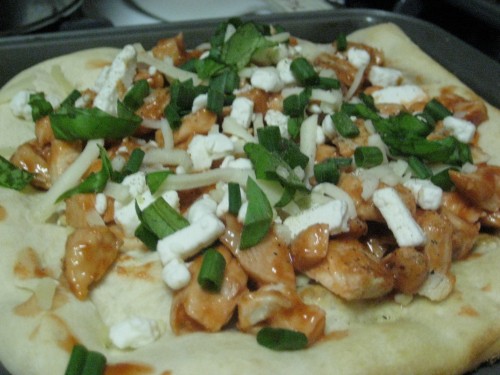
Then it is time to add your tasty ingredients! Mix the cooked chicken with BBQ sauce. Brush the two pizza doughs with olive oil (not too much). Evenly distribute each ingredient on each of the personal size pizzas. Spread the minced garlic clove, spread BBQ chicken, goat cheese, shredded mozzarella, scallions, basil leaves, drizzle some extra BBQ sauce on top, and sprinkle a pinch of salt and pepper. Bake the pizzas for another 10 minutes on 425 until the cheese is melted and the dough is very crispy.

Top with fresh baby arugula and enjoy!

What ingredients do you love to taste on pizza?? I love to read your thoughts. 🙂

I fled the city on this extremely hot summer weekend and headed to Long Island to spend time with my Mom. We had planned on doing the whole beach thing, but it was just too hot! So we did the other things that we always do together… got our nails done, did a little shopping, read, and cooked with the AC blasting.

My Mom loves to bake with blueberries in the Summer. So we decided to bake a tasty Blueberry Crunch. Let me tell you…this recipe is completely effortless and the blueberry crunch is the perfect summer dessert. We searched through Cooking Light, Food & Wine, and tons of cook books searching for some type of crunch dessert recipe to adapt. We could have easily searched the internet for this, but we had more fun looking through delicious looking magazines and cook books.  Finally after a few deviations reading about different recipes… we found one!  Ina Garten’s Plum Crunch.  We used this recipe as a base to help us with the measurements. But we changed the measurements around a bit to cut down butter and sugar.  Read how easy this sounds….

Ingredients

Blueberry mixture ( We omitted sugar in this mixture, and just added it to the crunch. The blueberries already have a natural sweetness.)

2  Small containers blueberries (the size of containers you find at the store)

1/4 cup all purpose flour

Crunch

1 1/2 cups all purpose flour

3/4 cup granulated sugar

3/4 cup light brown sugar

1/2 tsp salt

1 cup oatmeal ( Add more if mixture gets too sticky and not crumbly)

1/2 cup chopped walnuts

1 1/2 sticks cold butter cubed (We used Natural Balance Butter)(Original recipe 2 sticks)

Preheat the oven to 375 degrees. In a medium size baking dish (any shape that makes you happy) put the blueberries along the bottom and mix with the 1/4 cup of flour. Put this mixture aside.

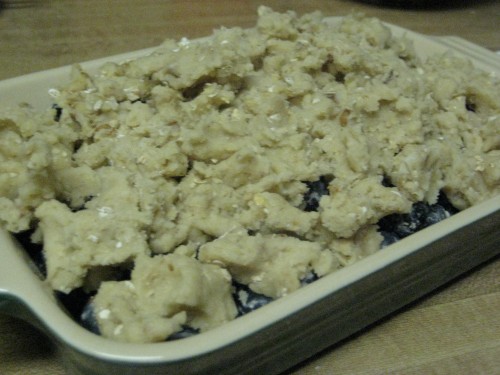
Connect the paddle attachment on your handy electric mixture. Combine all crunch ingredients and mix on a low speed. Mix until the mixture is crumbly and the butter is the size of “peas” as Ina Garten’s recipe states. Distribute the topping evenly on top of the blueberries. Bake at 375 for 40-45 minutes. It will be done once you see the blueberries bubbling and a golden brown crunch!

(Before it went in the oven)

So tasty alone or with ice cream. Look at how tasty it looked after it was baked! I wish you could see the blueberries bubbling.

What dessert do you like to bake with Summer’s fruits??

Burgers are the quintessential summer food. They are so easy, and  SO TASTY. All burgers need are tasty ingredients and not to be over cooked. How much easier can cooking get?! Today, in the fridge I had a few jars of roasted peppers, chives, turkey meat and basil just waiting to be used. So I decided to try out a new burger tonight.  To make the turkey mixture, I added chopped basil, chives, 1 garlic clove, pepper, salt, and chopped roasted peppers. I used my best tools, my hands to incorporate everything evenly. I made 4 patties out of 1 pound of turkey meat.

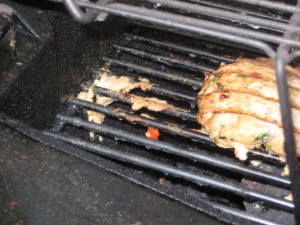
So..I am in Long Island for the rest of the week and I was actually able to use a real BBQ. I was excited about this, but I am used to grilling on my indoor stove-top grill. I was all excited and I forgot to put any spray on the grill itself, so one of my pretty patties ended up loosing a little bit of itself…

Oh well, it still tasted good! Next time, I will try to control my excitement and spray the grill:) So… I grilled the burgers over a medium flame for about 4 minutes per side. I topped the burger with muenster cheese, and a herb mayo I quickly put together (lemon zest, chives, basil), so tasty!

What is your favorite burger??

Stay tuned for the oven potato recipe…….